Cutting Symmetric Shapes
Kirigami is the art of creating designs by folding a piece of paper and then cutting the paper while it is folded. There may be more than one fold, and the folds can happen in different directions.
Folding the paper once and cutting it creates a design where one side is the mirror image, or reflection, of the other.
Ideas to explore
- Experiment with cutting out faces, lamps, or geometric shapes.
- Use two intersecting folds to create designs with mirror images in two directions. This makes it easy to create designs such as flowers.
- Try various folds and cuts. Create snowflake designs by starting with the same two folds as in the last example. Then use two more folds that split the folded paper into thirds.
- Make a game of this by working backwards – draw a symmetrical shape on a piece of paper and challenge each other to cut a folded piece of paper to create that shape.
Bonus Material
Introduction
Create designs by folding a piece of paper and cutting the paper while it is folded. This is called Kirigami.
One Fold
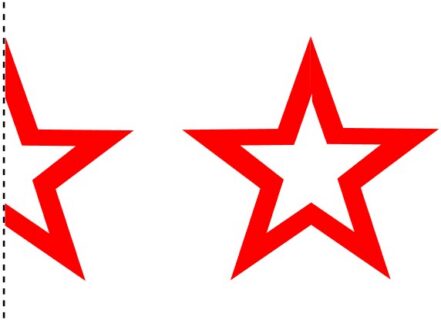
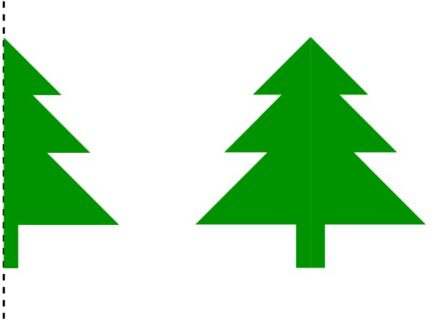
Folding the paper once and cutting it creates a design with one side the mirror image of the other. Experiment with cutting out faces, lamps, or geometric shapes. The star and tree were produced with a single fold, which is shown on the left, and then the unfolded paper is shown on the right.
Two Folds
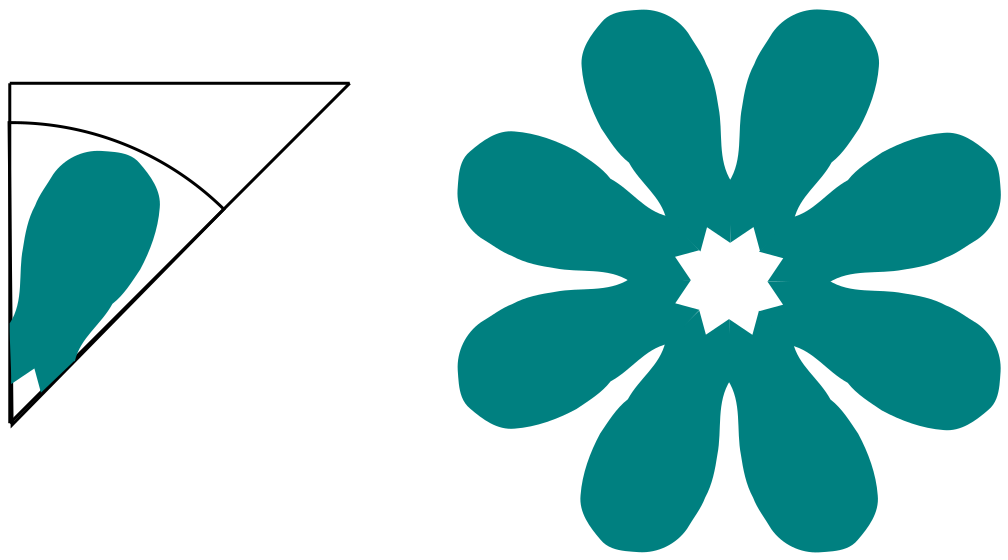
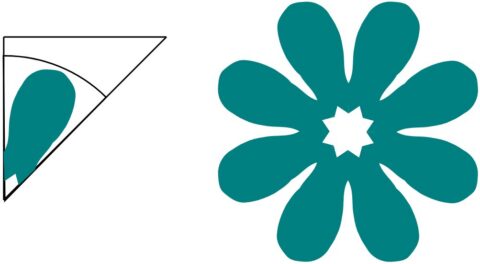
Folding the paper once, and then folding once more in the opposite direction, will produce figures with two lines of mirror images. This makes it easy to create designs such as flowers. The figure on the left is the paper folded twice and cut to leave the blue area, and the figure on the right shows the unfolded paper.

Three Folds
Experiment with various folds and cuts. This figure was created by taking a twice folded piece of paper and then folding it once more diagonally through the corner of the previous folds.
Snowflakes
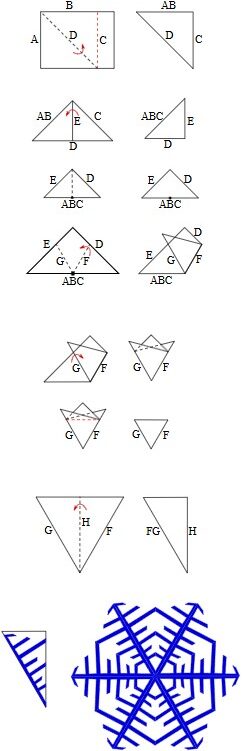
This is a sequence of folds for creating 6-point snowflakes. Though it takes a few steps, don’t be put off by them – with a little practice they become quick and easy.
Start by taking a standard sheet of paper and folding at one of the corners so the sides marked A and B meet. Leave the fold in place and cut along the line marked C.
Take the triangle produced and fold it in half so that sides AB and C overlap.
Put a temporary fold in this triangle and use the fold to mark the middle of side ABC. Undo the temporary fold.
Make a fold over F. When you fold over F, you will be looking to have G placed so that G breaks the angle in half.
Fold along G – do this fold underneath so that this new folded piece is underneath the other paper.
Although not strictly necessary, it is a good idea to slice off the top of this figure. Otherwise, you might be tempted to use the region above the red dotted line without realizing that there isn’t paper on all levels.
Lastly, fold this triangle in half. At last you are all set to do the cutting of your design!
Have fun experimenting with many different combinations of cuts and colors!